|
本文介绍在FreeBSD 12系统中安装Webmin的方法,可以从二进制存储库安装,也可以从源代码安装Webmin。FreeBSD是在Linux虚拟机Virtualbox里运行的,参考在Ubuntu 18.04/Debian 9上安装VirtualBox 6.0的方法。
在FreeBSD 12上安装Webmin FreeBSD自带包管理器,名为pkg,我们将用它来安装Webmin。 首先更新你的FreeBSD包索引: # pkg update Updating FreeBSD repository catalogue… Fetching meta.txz: 100% 944 B 0.9kB/s 00:01 Fetching packagesite.txz: 100% 6 MiB 668.1kB/s 00:10 Processing entries: 100% FreeBSD repository update completed. 32049 packages processed. All repositories are up to date. 一旦更新返回成功,请通过运行以下命令在FreeBSD 12上安装Webmin: # pkg install webmin Updating FreeBSD repository catalogue… FreeBSD repository is up to date. All repositories are up to date. The following 8 package(s) will be affected (of 0 checked): New packages to be INSTALLED: webmin: 1.900 p5-Net-SSLeay: 1.85 perl5: 5.28.1 p5-Authen-PAM: 0.16_2 python27: 2.7.15 readline: 7.0.5 libffi: 3.2.1_3 p5-IO-Tty: 1.12_2 Number of packages to be installed: 8 The process will require 210 MiB more space. 42 MiB to be downloaded. Proceed with this action? [y/N]: y [1/8] Fetching webmin-1.900.txz: 100% 16 MiB 1.2MB/s 00:15 [2/8] Fetching p5-Net-SSLeay-1.85.txz: 100% 253 KiB 258.8kB/s 00:01 [3/8] Fetching perl5-5.28.1.txz: 100% 14 MiB 183.5kB/s 01:20 [4/8] Fetching p5-Authen-PAM-0.16_2.txz: 100% 21 KiB 21.3kB/s 00:01 [5/8] Fetching python27-2.7.15.txz: 100% 11 MiB 291.0kB/s 00:38 [6/8] Fetching readline-7.0.5.txz: 100% 332 KiB 113.4kB/s 00:03 [7/8] Fetching libffi-3.2.1_3.txz: 100% 34 KiB 35.0kB/s 00:01 [8/8] Fetching p5-IO-Tty-1.12_2.txz: 100% 30 KiB 30.5kB/s 00:01 Checking integrity… done (0 conflicting) [1/8] Installing perl5-5.28.1… [1/8] Extracting perl5-5.28.1: 100% [2/8] Installing readline-7.0.5… [2/8] Extracting readline-7.0.5: 100% [3/8] Installing libffi-3.2.1_3… [3/8] Extracting libffi-3.2.1_3: 100% [4/8] Installing p5-Net-SSLeay-1.85… [4/8] Extracting p5-Net-SSLeay-1.85: 100% [5/8] Installing p5-Authen-PAM-0.16_2… [5/8] Extracting p5-Authen-PAM-0.16_2: 100% [6/8] Installing python27-2.7.15… [6/8] Extracting python27-2.7.15: 100% [7/8] Installing p5-IO-Tty-1.12_2… [7/8] Extracting p5-IO-Tty-1.12_2: 100% [8/8] Installing webmin-1.900… [8/8] Extracting webmin-1.900: 100% ..... 首次安装Webmin后,应该以root身份运行以下命令来配置Webmin: # /usr/local/lib/webmin/setup.sh Welcome to the Webmin setup script, version 1.900 * Webmin is a web-based interface that allows Unix-like operating systems and common Unix services to be easily administered. Installing Webmin in /usr/local/lib/webmin … Webmin uses separate directories for configuration files and log files. Unless you want to run multiple versions of Webmin at the same time you can just accept the defaults. Log file directory [/var/log/webmin]: Webmin is written entirely in Perl. Please enter the full path to the Perl 5 interpreter on your system. Full path to perl (default /usr/local/bin/perl): Testing Perl … Perl seems to be installed ok Operating system name: FreeBSD Operating system version: 12.0 Webmin uses its own password protected web server to provide access to the administration programs. The setup script needs to know : What port to run the web server on. There must not be another web server already using this port. The login name required to access the web server. The password required to access the web server. If the webserver should use SSL (if your system supports it). Whether to start webmin at boot time. Web server port (default 10000): Login name (default admin): Login password: <Enter admin Password> Password again: <Conform admin Password> Use SSL (y/n): y Creating web server config files.. ..done Creating access control file.. ..done Creating start and stop scripts.. ..done Copying config files.. ..done Changing ownership and permissions .. ..done Running postinstall scripts .. ..done Enabling background status collection .. ..done 确保你设置:配置文件目录、日志文件目录、Perl的完整路径、Web服务器端口(默认10000)、登录名(默认管理员)、登录密码、SSL选项(是/否)。
在FreeBSD 12上启动Webmin服务 我们在FreeBSD 12系统上安装并配置了Webmin,最后一步是将Webmin服务设置为在启动时启动并启动服务。 将Webmin服务设置为在系统引导时启动: # sysrc webmin_enable="YES" webmin_enable: -> YES 上面的命令会将webmin_enable="YES"行添加到/etc/rc.conf中。 要首次启动Webmin,请运行: # service webmin start Starting webmin. Cron 15469220631494 missing any time spec 该服务应该在端口10000上侦听: # sockstat -4 -6 |grep 10000 root perl 1536 5 tcp4 *:10000 *:* root perl 1536 6 udp4 *:10000 *:*
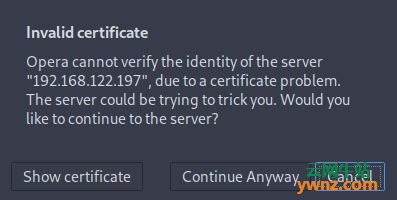
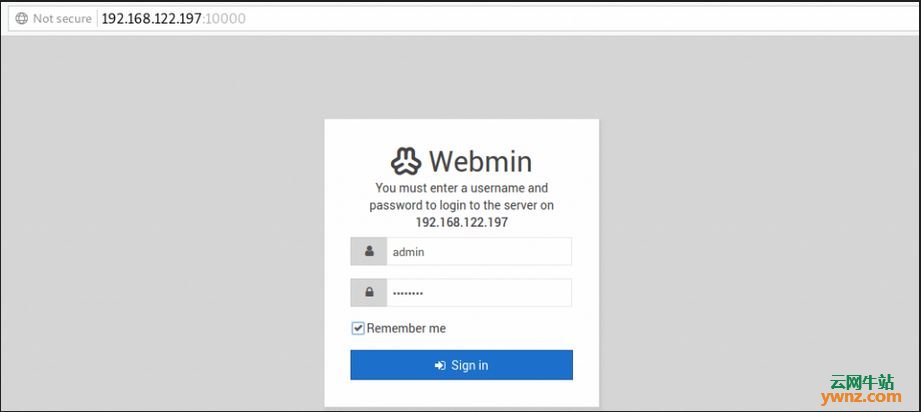
访问Webmin界面 在浏览器打开服务器URL/IP地址端口10000,例如https://192.168.122.197:10000。 如果出现“Invalid Certificate”警告,请单击仍然继续(Continue Anyway):
使用安装期间指定的用户名及密码来登录:
到这里,你现在已经在FreeBSD 12系统上安装了Webmin,可以从Web界面轻松管理你的FreeBSD服务器了。
相关主题 |