|
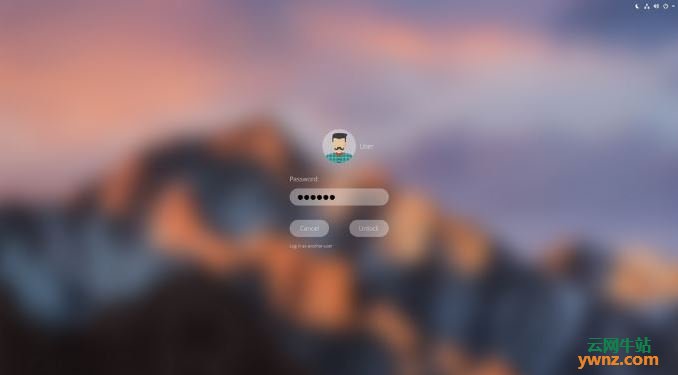
如下图,这是一个macOS风格的登录背景,还带虚化效果的。我们将在本文详细讲解在ubuntu18.04系统中修改登录背景的方法。
安装帮助原文(英文,下载包请看下面的中文注解): Description: This is theme nearly looks like macOS, with script which can set wallpaper for your desktop and simultaneously set same wallpaper on lock screen and login screen with blur effect like on macOS. In attachment you will find file ubuntu.css, where injected some changes, to make your login screen and lock screen looks more like mac OS. ATTENTION: TESTED ONLY ON UBUNTU 17.10 with GDM3 (xorg) and 18.04 LTS (ubuntu). (Any other OS based on Linux didn't tested!!!) INSTRUCTION: VIDEO INSTRUCTION: https://youtu.be/NMuiCFTpy7s 1. First of all you have to unpuck archive and change your ubuntu.css file (/usr/share/gnome-shell/theme/ubuntu.css). changes in attachments. # sudo cp /usr/share/gnome-shell/theme/ubuntu.css /usr/share/gnome-shell/theme/ubuntu.bak # sudo cp ~/Downloads/ "folder with unpacked files' /ubuntu.css /usr/share/gnome-shell/theme/ # sudo chmod 777 /usr/share/backgrounds/ 2. Second thing is, set nautilus script by copying script it self "SetAsWallpaper" to '/home/click/.local/share/nautilus/scripts/' then you have to change access for your script by "sudo chmod +x SetAsWallpaper" and enter root password. Restart your nautilus in terminal by command nautilus -q, or killall nautilus. 3. Now you just choose your image right click mouse button you will see script and "SetAsWallpaper" just click on it, this is it. 4. It`s last step, and you have to do it just once. At the desktop right click on screen select "Change Background" then "Lock Screen" and "Pictures", find there your blurred image and choose it. Just once! 5. For avoiding issue in use, go to path /home/your_name/.cache/wallpaper and remove all files inside !!! (18.04 LTS)
接下来我们仿制上面做法来尝试修改ubuntu18.04登录背景 1.去files标签页下下载SetAsWallpaperV1.3.tar.xz然后解压压缩包,我是解压到了~/MyDownload/ 2.该文件夹下有三个文件 ubuntu.css:一个css样式文件 SetAsWallpaper:一个图像模糊处理脚本文件 readme:安装教程帮助文件
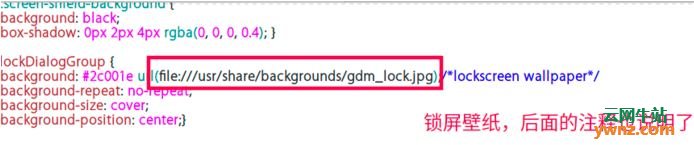
先说明下修改登录界面样式的原理 重要步骤是在css文件,这个/usr/share/gnome-shell/theme/ubuntu.css就配置了登录界面的样式。 在/home/cmd/MyDownload/SetAsWallpaperV1.3/ubuntu.css文件(上面我下载的包中,非系统自带的这个css文件)中有这样一行代码:
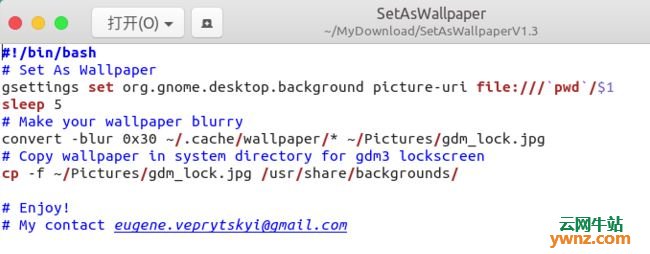
是的,Ubuntu18.04的登录界面是用css文件渲染的,做网页前端的应该最熟悉不过了。 如果你只想替换登录界面的背景,把系统自带的这个css文件中指定图像文件的位置修改成你自己的图片的绝对目录就行了。 当然,如果你想让你的登录界面炫酷一些,修改css文件,渲染成你想要的效果即可。 或者你想省事,那就和我一样去网上下载别人写好的css文件。 在我下载的中,还有个SetAsWallpaper脚本文件,内容如下:
有注释,这个脚本的作用是把你现在正在用的壁纸模糊处理,然后放到 ~/Pictures/gdm_look.jpg,执行过脚本后,你的 ~/Pictures目录下就会多一个gdm_look.jpg文件,这个文件就是你当前用的壁纸的模糊处理过后的图片。然后 ~/Pictures/gdm_look.jpg又被复制到/usr/share/backgrounds/目录下,再看下面这个图:
这个包中提供的css文件指定的登录页面壁纸,也就是脚本处理完后cp到/usr/share/backgrounds/的gdm_look.jpg。
原理说明白了,操作如下: 1.备份/usr/share/gnome-shell/theme/ubuntu.css sudo cp /usr/share/gnome-shell/theme/ubuntu.css /usr/share/gnome-shell/theme/ubuntu.css.backup 2.用/home/cmd/MyDownload/SetAsWallpaperV1.3/的ubuntu.css替换掉系统自带的/usr/share/gnome-shell/theme/ubuntu.css sudo cp /home/cmd/MyDownload/SetAsWallpaperV1.3/ubuntu.css /usr/share/gnome-shell/theme/ 3.把SetAsWallpaper脚本文件复制到~/.local/share/nautilus/scripts/目录下,然后修改下权限 sudo chmod 775 SetAsWallpaper cmd@TR:~/.local/share/nautilus/scripts$ ls -al 总用量 12 drwx------ 2 cmd cmd 4096 7月 11 09:55 . drwxrwxr-x 3 cmd cmd 4096 7月 4 13:04 .. -rwxr-xr-x 1 root root 363 7月 11 09:55 SetAsWallpaper 4.然后重启nautilus 也就是文件(下面的命令是关闭nautilus ) nautilus -q 然后再打开文件 执行如下命令,修改下 /usr/share/backgrounds 的权限 sudo chmod 775 /usr/share/backgrounds/ 5.最后一步,去~/.local/share/nautilus/scripts/ 目录下执行下SetAsWallpaper脚本。 这时候你会发现,报错了: cmd@TR:~/.local/share/nautilus/scripts$ ./SetAsWallpaper convert-im6.q16: unable to open image `/home/cmd/.cache/wallpaper/*': 没有那个文件或目录 @ error/blob.c/OpenBlob/2701. convert-im6.q16: no decode delegate for this image format `' @ error/constitute.c/ReadImage/504. convert-im6.q16: no images defined `/home/cmd/Pictures/gdm_lock.jpg' @ error/convert.c/ConvertImageCommand/3258. cp: 无法获取'/home/cmd/Pictures/gdm_lock.jpg' 的文件状态(stat): 没有那个文件或目录 解决方案: 我们来分析一下这个错误,其实就是 /home/cmd/.cache/ 下没有 wallpaper 目录 去 /home/cmd/.cache/ 下 mkdir wallpaper 一个。 此步很重要!然后将你要设置的登录背景图片为也复制到此,保持分辨率与你的屏幕当前分辨率一致比如我的是 1920*1080。 cmd@TR:~/.cache/wallpaper$ ls -al 总用量 316 drwxr-xr-x 2 cmd cmd 4096 7月 11 09:52 . drwx------ 15 cmd cmd 4096 7月 11 09:33 .. -rwxr-xr-x 1 cmd cmd 314411 6月 19 2018 ubuntulogin.jpg 然后下边这句也要改 /home/cmd/Pictures/,原作者的是英文桌面环境所以默认的图片文件夹 叫Pictures,所以我们改为中文桌面环境的目录,最后~/.local/share/nautilus/scripts 的 SetAsWallpaper 脚本内容如下: cmd@TR:~/.local/share/nautilus/scripts$ cat SetAsWallpaper #!/bin/bash # Set As Wallpaper gsettings set org.gnome.desktop.background picture-uri file:///`pwd`/$1 sleep 5 # Make your wallpaper blurry convert -blur 0x30 ~/.cache/wallpaper/* ~/图片/gdm_lock.jpg # Copy wallpaper in system directory for gdm3 lockscreen cp -f ~/图片/gdm_lock.jpg /usr/share/backgrounds/ # Enjoy! # My contact eugene.veprytskyi@gmail.com 最后我们来执行 cmd@TR:~/.local/share/nautilus/scripts$ sudo ./SetAsWallpaper 这此我加了 sudo,因为 /usr/share/backgrounds 目录所有人和所属组实际是root账号。 正常的话,就不会报任何错误。然后你到/usr/share/backgrounds 目录下就会看到生成的 cmd@TR:/usr/share/backgrounds$ ls -al | grep gdm_lock.jpg -rw-r--r-- 1 root root 125309 7月 11 09:56 gdm_lock.jpg 接下来,重启系统就好了。(执行脚本后,你的桌面壁纸可能会没了,重新设置下就好了。)
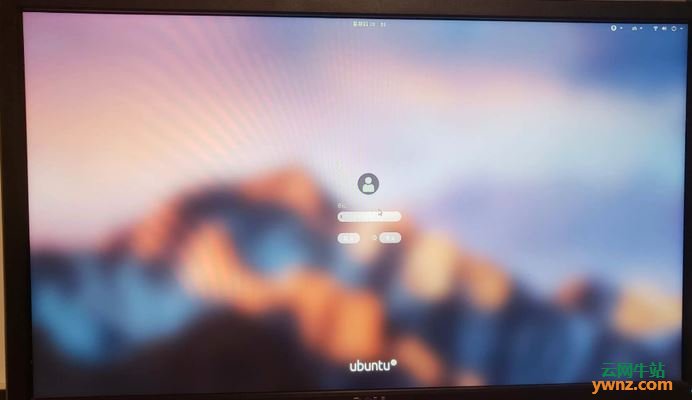
放一张成果图:
最后 我们再仔细看下原作者的安装帮助,原作者的做法,实际是给文件夹图形化的添加了个右键--》脚本功能(也就是目录~/.local/share/nautilus/scripts 的那个 SetAsWallpaper) 他实际是想直接选中图片然后右键-》脚本执行SetAsWallpaper 给桌面背景和锁屏桌面快捷转换背景虚化的背景图片。
相关主题 |