|
本文向你展示如何在Ubuntu 18.04系统上安装Seafile服务器,按照以下步骤在Ubuntu 18.04上安装Seafile Server。
简介 Seafile Server是一个开源,企业,自托管文件托管平台,可提供高性能和高可靠性。Seafile使你可以将文件放在自己的服务器上,并允许其他人和你的不同设备同步和访问它。你也可以将所有文件作为虚拟磁盘访问。 Seafile的特点: 内置文件加密:文件在同步到服务器之前已加密,甚至系统管理员也无法查看文件。 Drive Client:使用驱动器客户端访问本地S:驱动器中的云中的文件,而无需同步它们。 可靠的文件同步:具有可靠,高效的文件同步功能,可提高你的工作效率。 易于升级:可以在几秒钟内运行一个简单的脚本来完成升级。 企业就绪:Seafile支持AD/LDAP集成、组同步、权限控制使该工具可轻松应用于你的企业环境。
Seafile服务器要求 HTTP服务器 - Nginx或Apache 数据库服务器 - MySQL或MariaDB Python工具
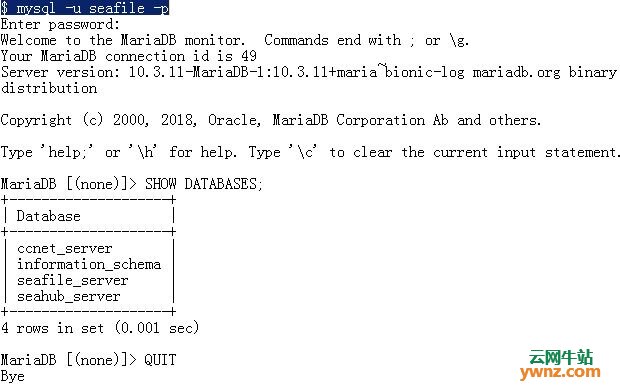
第1步:安装MariaDB数据库服务器 首先使用先安装MariaDB数据库,参考在Ubuntu 18.04系统上安装MariaDB 10.4的步骤。 安装MariaDB数据库服务器后,为Seafile创建用户和数据库。 首次以root用户身份登录MySQL shell: $ mysql -u root -p Seafile Server的三个组件需要自己的数据库: ccnet server seafile server seahub server 我们将为每个服务器组件创建一个数据库: CREATE DATABASE seafile_server; CREATE DATABASE ccnet_server; CREATE DATABASE seahub_server; 为创建的数据库创建数据库用户和授予权限: CREATE USER 'seafile'@'localhost' IDENTIFIED BY 'StrongPassword'; GRANT ALL ON seafile_server.* TO 'seafile'@'localhost'; GRANT ALL ON ccnet_server.* TO 'seafile'@'localhost'; GRANT ALL ON seahub_server.* TO 'seafile'@'localhost'; 通过以seafile用户身份登录数据库来确认访问: $ mysql -u seafile -p
第2步:安装Python依赖项 Seafile在很大程度上依赖于Python及其模块,通过在终端中运行以下命令,在Ubuntu 18.04上安装所需的Python依赖项: sudo apt -y install python python-pip python-pil python-ldap python-urllib3 libpython3.6 python-setuptools python-mysqldb python-memcache python-requests ffmpeg
第3步:下载并安装Seafile Server 下载之前,请检查最新版本的Seafile Server,当然,也可以选择某个Seafile版本。 在终端中下载: sudo apt -y install wget wget https://download.seadrive.org/seafile-server_6.2.5_x86-64.tar.gz 下载文件后,将存档解压缩到/srv目录: sudo tar -xvf seafile-server_6.2.5_x86-64.tar.gz -C /srv sudo mv /srv/seafile-server-6.2.5 /srv/seafile 无需安装,只需运行安装脚本即可: cd /srv/seafile/ sudo ./setup-seafile-mysql.sh 该脚本将指导你使用MySQL设置你的seafile服务器: $ sudo ./setup-seafile-mysql.sh Checking python on this machine ... Checking python module: setuptools ... Done. Checking python module: python-imaging ... Done. Checking python module: python-mysqldb ... Done. This script will guide you to setup your seafile server using MySQL. Make sure you have read seafile server manual at https://github.com/haiwen/seafile/wiki Press ENTER to continue What is the name of the server? It will be displayed on the client. 3 - 15 letters or digits [ server name ] Seafile-Server What is the ip or domain of the server? For example: www.mycompany.com, 192.168.1.101 [ This server's ip or domain ] fileserver.example.com Where do you want to put your seafile data? Please use a volume with enough free space [ default "/srv/seafile-data" ] Which port do you want to use for the seafile fileserver? [ default "8082" ] Please choose a way to initialize seafile databases: [1] Create new ccnet/seafile/seahub databases [2] Use existing ccnet/seafile/seahub databases [ 1 or 2 ] 2 What is the host of mysql server? [ default "localhost" ] What is the port of mysql server? [ default "3306" ] Which mysql user to use for seafile? [ mysql user for seafile ] seafile What is the password for mysql user "seafile"? [ password for seafile ] verifying password of user seafile ... done Enter the existing database name for ccnet: [ ccnet database ] ccnet_server verifying user "seafile" access to database ccnet_server ... done Enter the existing database name for seafile: [ seafile database ] seafile_server verifying user "seafile" access to database seafile_server ... done Enter the existing database name for seahub: [ seahub database ] seahub_server verifying user "seafile" access to database seahub_server ... done This is your configuration server name: Seafile-Server server ip/domain: fileserver.example.com seafile data dir: /srv/seafile-data fileserver port: 8082 database: use existing ccnet database: ccnet_server seafile database: seafile_server seahub database: seahub_server database user: seafile Press ENTER to continue, or Ctrl-C to abort Generating ccnet configuration ... done Successly create configuration dir /srv/ccnet. Generating seafile configuration ... Done. done Generating seahub configuration ... Now creating seahub database tables ... creating seafile-server-latest symbolic link ... done Your seafile server configuration has been finished successfully. run seafile server: ./seafile.sh { start | stop | restart } run seahub server: ./seahub.sh { start <port> | stop | restart <port> } If you are behind a firewall, remember to allow input/output of these tcp ports: port of seafile fileserver: 8082 port of seahub: 8000 When problems occur, Refer to https://github.com/haiwen/seafile/wiki for information. 注:Seafile Server将在端口8082上运行,Seafile Web UI将在端口8000上可用。
第4步:启动Seafile服务 启动Seafile Server守护程序,它处理原始文件上载,下载和同步: # cd /srv/seafile # ./seafile.sh start [1/4/19 02:08:27] ../common/session.c(132): using config file /srv/conf/ccnet.conf Starting seafile server, please wait ... Seafile server started Done. 然后启动Seahub(Django)Web前端服务: root@ubuntu-01:/srv/seafile# ./seahub.sh start LC_ALL is not set in ENV, set to en_US.UTF-8 Starting seahub at port 8000 ... It's the first time you start the seafile server. Now let's create the admin account What is the email for the admin account? [ admin email ] admin@example.com What is the password for the admin account? [ admin password ] <ENTER ADMIN PASSWORD> Enter the password again: <CONFIRM ADMIN PASSWORD> [ admin password again ] Successfully created seafile admin Seahub is started Done. 如果遇到区域设置问题,请按如下所示进行设置: export LC_ALL=en_US.UTF-8 export LANG=en_US.UTF-8 export LANGUAGE=en_US.UTF-8 将行添加到~/.bashrc文件以具有持久的LC设置。
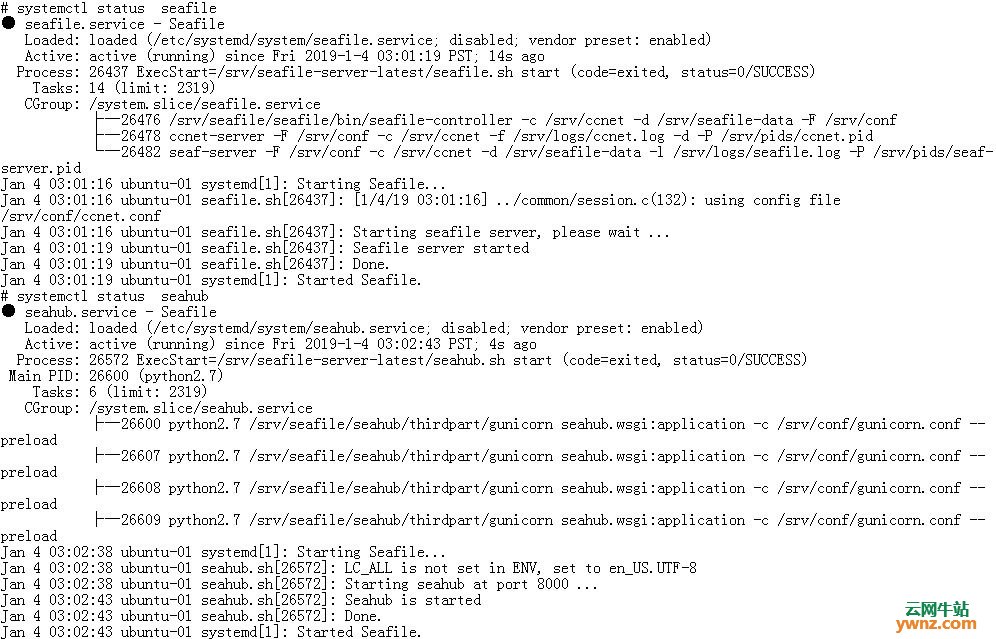
第5步:创建Seafile Systemd服务 我更喜欢用systemd管理Seafile,为Seafile后端服务器创建systemd单元文件: sudo vim /etc/systemd/system/seafile.service 增加以下代码: [Unit] Description=Seafile After= mysql.service After=network.target [Service] Type=forking ExecStart=/srv/seafile-server-latest/seafile.sh start ExecStop=/srv/seafile-server-latest/seafile.sh stop [Install] WantedBy=multi-user.target 也为Seahub创建一个: # cat /etc/systemd/system/seahub.service [Unit] Description=Seafile After= mysql.service After=network.target [Service] Type=forking ExecStart=/srv/seafile-server-latest/seahub.sh start ExecStop=/srv/seafile-server-latest/seahub.sh stop [Install] WantedBy=multi-user.target 启动并启用服务以在启动时启动: sudo systemctl daemon-reload sudo systemctl start seafile && sudo systemctl enable seafile sudo systemctl start seahub && sudo systemctl enable seahub 确认服务状态: # systemctl status seafile # systemctl status seahub
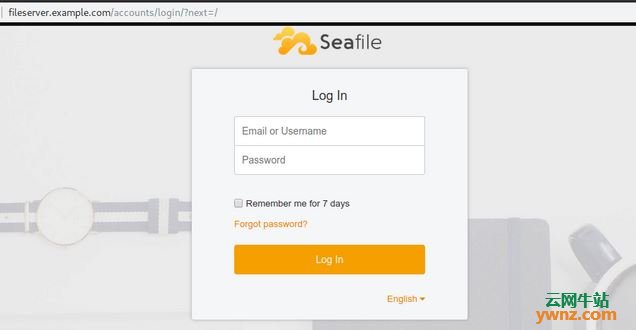
第6步:配置Nginx反向代理 现在你已经运行了服务,现在是时候将nginx配置为Seafile服务器的反向代理了: sudo apt -y install nginx 在/etc/nginx/conf.d/seafile.conf下创建一个新配置文件,其中包含以下内容: server { listen 80; listen [::]:80; server_name fileserver.example.com; autoindex off; client_max_body_size 100M; access_log /var/log/nginx/seafile.com.access.log; error_log /var/log/nginx/seafile.com.error.log; location / { proxy_pass http://127.0.0.1:8000; proxy_set_header Host $host; proxy_set_header X-Real-IP $remote_addr; proxy_set_header X-Forwarded-For $proxy_add_x_forwarded_for; proxy_set_header X-Forwarded-Host $server_name; proxy_read_timeout 1200s; } location /seafhttp { rewrite ^/seafhttp(.*)$ $1 break; proxy_pass http://127.0.0.1:8082; proxy_set_header X-Forwarded-For $proxy_add_x_forwarded_for; proxy_connect_timeout 36000s; proxy_read_timeout 36000s; proxy_send_timeout 36000s; send_timeout 36000s; } location /media { root /srv/seafile-server-latest/seahub; } } 在http://example.com上访问你的Seafile服务器域名:
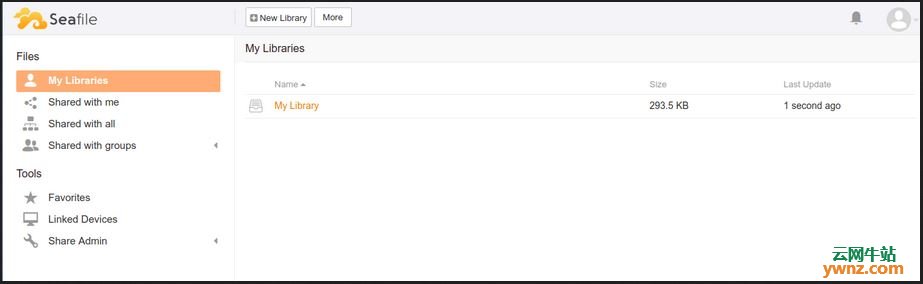
输入管理员用户电子邮件和密码登录,这个时候就可以访问Seafile仪表板了:
至此,你已在Ubuntu 18.04 LTS系统上成功安装并配置了Seafile Server。
相关主题 |