|
在本文中,我们将分别使用Firewalld和ufw来保护在CentOS 7和Ubuntu服务器上运行的Zimbra,如果你的服务器运行的是CentOS 6.x系统,可以使用UFW或raw iptables命令,但端口号保持不变。
在Ubuntu和CentOS上安装UFW 使用以下命令在Ubuntu上安装UFW: sudo apt-get update && sudo apt-get -y install ufw 参考:Debian、Ubuntu、Linux Mint系统中的UFW防火墙入门教程。 对于CentOS,ufw包在EPEL存储库中可用,添加如下: sudo yum -y install epel-release sudo yum makecache fast sudo yum -y install ufw
在CentOS 7上安装Firewalld 如果你的CentOS未自带有firewalld,可以使用以下命令安装它: sudo makecache fast sudo yum -y install firewalld 启动并启用firewalld服务: sudo systemctl start firewalld sudo systemctl enable firewalld Rember首先添加你的ssh端口,这样你就不会被踢出去。 也可以参考在Ubuntu 18.04/16.04系统上安装和使用Firewalld的方法。
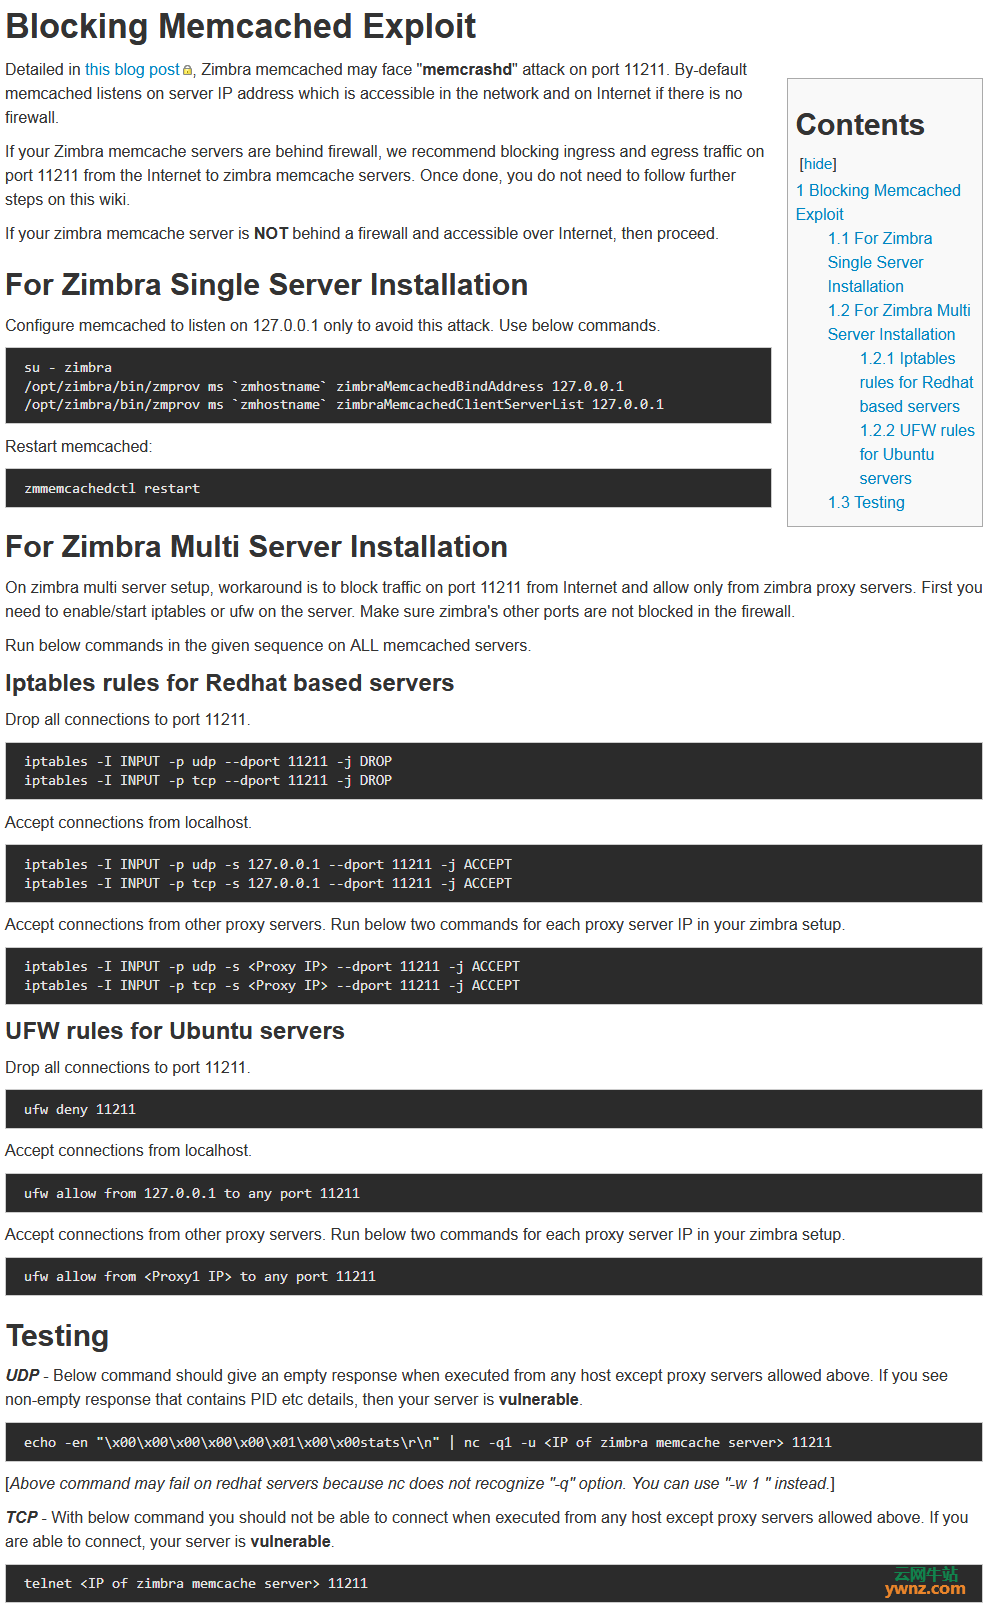
使用UFW配置Zimbra防火墙 由于最近对UDP端口的Memcache放大攻击,我们不会在防火墙上启用Memcache的udp端口-端口11211/udp,我们只会打开tcp端口,这样可以免受这些攻击。 对于ufw,我们将为UFW创建一个名为Zimbra的应用程序配置文件,所以,让我们创建如下配置文件: sudo vim /etc/ufw/applications.d/zimbra 添加以下内容: [Zimbra] title=Zimbra Collaboration Server description=Open source server for email, contacts, calendar, and more. ports=22,25,80,110,143,161,389,443,465,514,587,993,995,7071,8443,11211/tcp 在ufw上启用应用配置文件: sudo ufw allow Zimbra sudo ufw enable 也添加ssh端口: sudo ufw allow ssh 如果你对Zimbra配置文件进行了任何更改,请使用以下命令进行更新: $ sudo ufw app update Zimbra Rules updated for profile 'Zimbra' Skipped reloading firewall 对于单服务器安装,Memcache不在本地服务器之外使用,考虑将其绑定到环回IP地址,使用命令: su - zimbra zmprov ms zmhostname zimbraMemcachedBindAddress 127.0.0.1 zmprov ms zmhostname zimbraMemcachedClientServerList 127.0.0.1 然后重启Memcached服务: su - zimbra -c "zmmemcachedctl restart"
使用Firewalld配置Zimbra防火墙 对于firewalld用户,首先确认firewalld处于运行状态: sudo firewall-cmd --state running 如果没有运行,请使用: sudo systemctl start firewalld 然后在防火墙上配置Zimbra端口和服务: sudo firewall-cmd --add-service={http,https,smtp,smtps,imap,imaps,pop3,pop3s} --permanent sudo firewall-cmd --add-port 7071/tcp --permanent sudo firewall-cmd -add-port 8443/tcp --permanent 重新加载firewalld配置: sudo firewall-cmd --reload 可以使用以下方法确认运行: $ sudo firewall-cmd --list-all public target: default icmp-block-inversion: no interfaces: sources: services: dhcpv6-client http https imap imaps pop3 pop3s smtp smtps snmp ssh ports: 7071/tcp 8443/tcp ...
限制对管理面板的访问 始终将对端口7071的访问限制为受信任的网络或IP地址是一种很好的做法,对于UFW,使用以下命令完成: $ sudo ufw allow from 192.168.1.10 to any port 7071 $ sudo ufw allow from 192.168.1.0/24 to any port 7071 使用firewalld,你可以使用Rich Rules: sudo firewall-cmd --permanent --zone=public --add-rich-rule 'rule family="ipv4" source address="192.168.1.10/32" port protocol="tcp" port="7071" accept' sudo firewall-cmd --reload 现在,已经拥有安全的Zimbra设置。
附:Blocking Memcached Exploit
相关主题 |