|
本文介绍在CentOS 8/CentOS 7服务器上安装和配置YetiForce CRM的方法。基础的软件需求有:Apache Web服务器、MariaDB/MySQL数据库服务器、PHP。
步骤1:安装PHP和扩展 PHP是运行YetiForce CRM的核心要求之一。 针对CentOS 7: sudo yum install http://rpms.remirepo.net/enterprise/remi-release-7.rpm sudo yum -y install epel-release yum-utils sudo yum-config-manager --disable remi-php54 sudo yum-config-manager --enable remi-php72 sudo yum -y install wget php php-{pear,cgi,common,curl,mbstring,gd,mysqlnd,gettext,bcmath,json,xml,fpm,intl,zip} sudo yum -y install wget php php-{imap,soap,ldap,xmlrpc,gmp,apcu,imagick,opcache} 针对CentOS 8: sudo dnf -y install yum-utils sudo dnf -y install https://dl.fedoraproject.org/pub/epel/epel-release-latest-8.noarch.rpm sudo dnf -y install https://rpms.remirepo.net/enterprise/remi-release-8.rpm sudo dnf -y module reset php sudo dnf -y module install php:remi-7.2 sudo dnf -y install wget php php-{pear,cgi,common,curl,mbstring,gd,mysqlnd,gettext,bcmath,json,xml,fpm,intl,zip} sudo dnf -y install wget php php-{imap,soap,ldap,xmlrpc,gmp,apcu,imagick,opcache} 确认已安装PHP版本: $ php -v PHP 7.2.27 (cli) 编辑PHP配置文件并添加以下值: $ sudo vi /etc/php.ini memory_limit = 256M post_max_size = 20M upload_max_filesize = 20M max_execution_time = 300 display_errors = Off display_startup_errors = Off date.timezone = Asia/Shanghai 重新启动httpd服务: sudo systemctl restart httpd
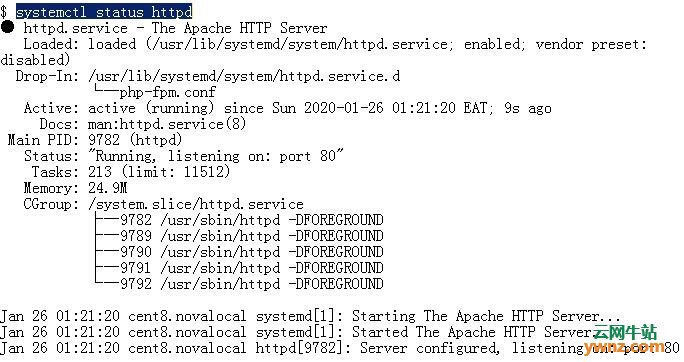
步骤2:安装Apache Web服务器 安装httpd apache Web服务器: sudo yum -y install httpd 启动并启用httpd服务。 sudo systemctl enable --now httpd 服务状态应更是正在运行的: $ systemctl status httpd
如果防火墙服务正在运行,则同时允许http和https端口: sudo firewall-cmd --add-service={http,https} --permanent sudo firewall-cmd --reload 参考:在CentOS 8系统上配置和管理防火墙(Firewall)的方法。
步骤3:安装和配置MariaDB 安装MariaDB数据库服务器,参考以下文章: 在CentOS 8/RHEL 8服务器上安装MariaDB 10.4版本的具体步骤。 在CentOS 7服务器中安装MariaDB 10.4的方法。 安装后,以root用户身份登录并为ERP应用程序创建数据库和用户: $ mysql -u root -p CREATE DATABASE yetiforce; CREATE USER 'yetiforce'@'localhost' IDENTIFIED BY 'Str0ngDBPassw0rd'; GRANT ALL PRIVILEGES ON yetiforcedb.* TO 'yetiforce'@'localhost' WITH GRANT OPTION; FLUSH PRIVILEGES; EXIT;
步骤4:在CentOS 8/CentOS 7上下载YetiForce CRM 查看Github上的YetiForce CRM版本页面以获取最新的可用版本,地址:https://github.com/YetiForceCompany/YetiForceCRM/releases。 安装wget和解压缩软件包: sudo yum -y install git unzip 下载可用的最新版本: wget https://github.com/YetiForceCompany/YetiForceCRM/releases/download/5.2.0/YetiForceCRM-5.2.0-complete.zip 将下载的文件解压缩到/var/www/html目录: sudo unzip YetiForceCRM-5.2.0-complete.zip -d /var/www/html/yetiforce
步骤5:在CentOS 8/CentOS 7上配置YetiForce CRM 为文件设置适当的权限: sudo chown -R apache:apache /var/www/html/yetiforce sudo chmod -R 755 /var/www/html/yetiforce 为YetiForce创建Apache配置文件: sudo vim /etc/httpd/conf.d/yetiforce.conf 必要时粘贴并编辑以下内容: <VirtualHost *:80> ServerAdmin admin@example.com ServerName crm.example.com DocumentRoot /var/www/html/yetiforce <Directory /var/www/html/yetiforce/> Options FollowSymlinks AllowOverride All Require all granted </Directory> ErrorLog /var/log/httpd/yetiforce_error.log CustomLog /var/log/httpd/yetiforce_access.log combined </VirtualHost> 注:crm.example.com是应用程序的域名。 重新启动httpd服务: sudo systemctl restart httpd
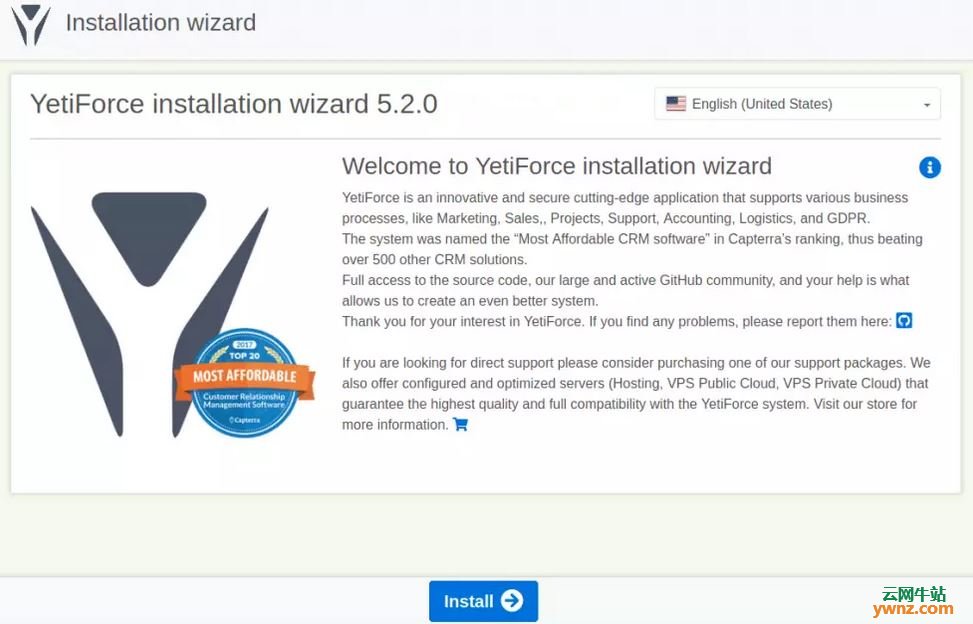
步骤6:完成YetiForce CRM的安装过程 在配置为crm.example.com或youserverip/yetiforce的域上访问YetiForce:
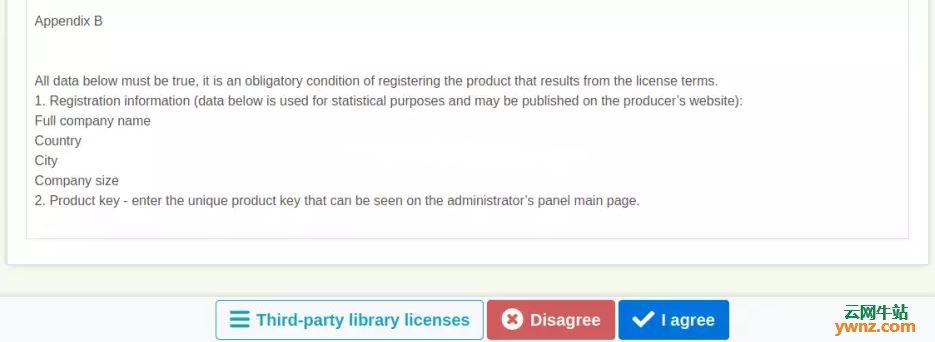
同意许可协议:
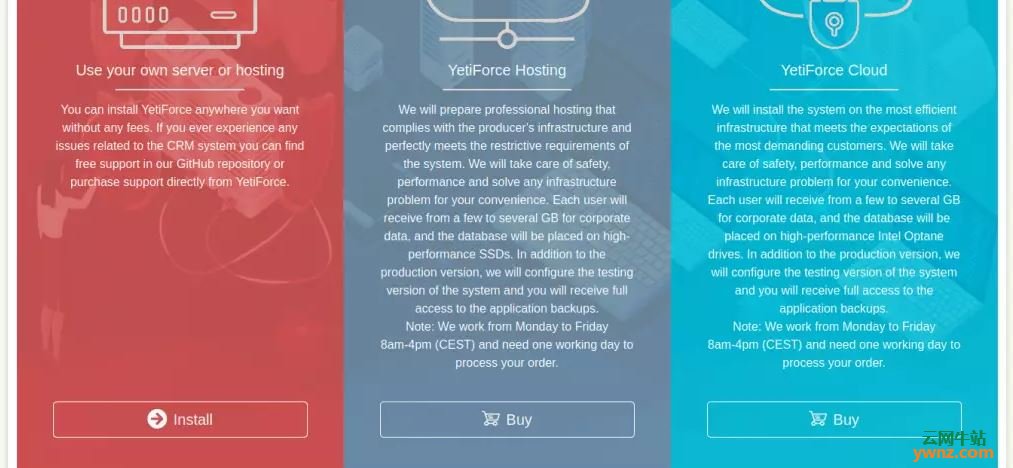
选择安装类型–自己的服务器:
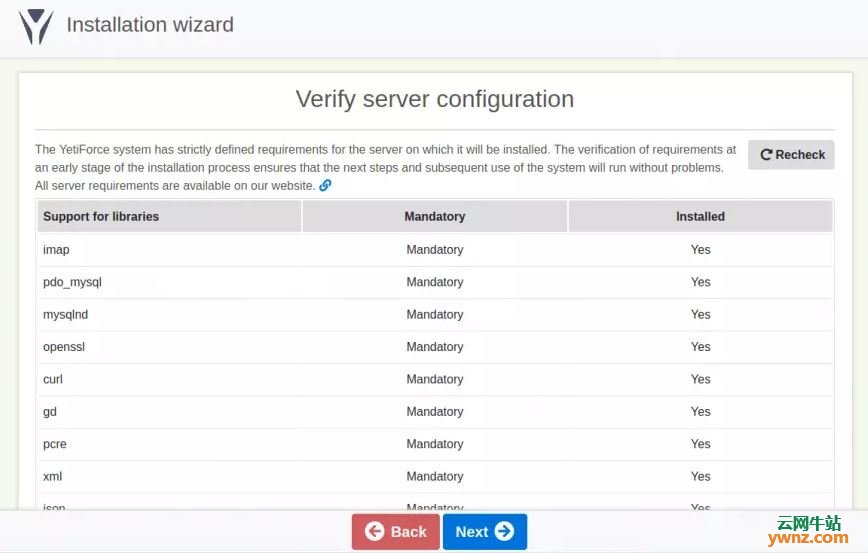
验证服务器配置并在必要时进行修复:
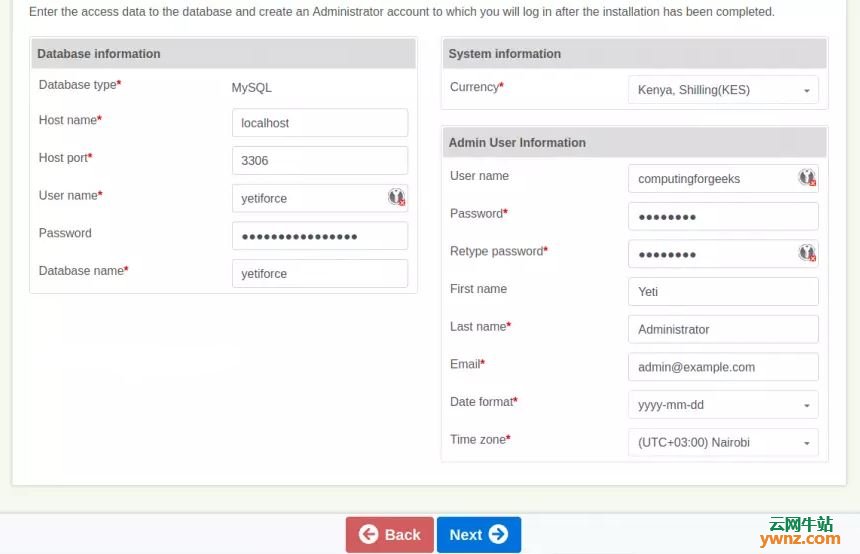
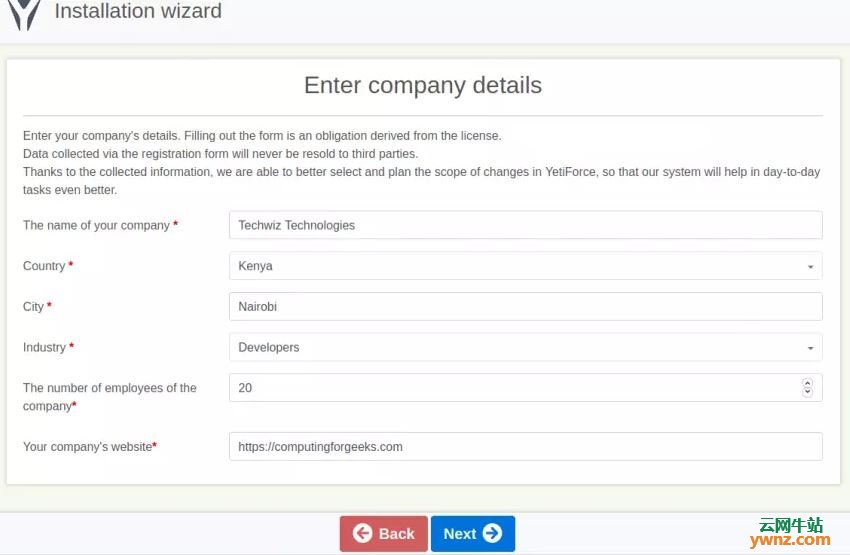
配置数据库连接、管理员和相关设置:
如果收到错误:“yetiforce -> Could not find this database. Try changing the database settings”,尝试使用root用户连接到yetiforce数据库。 填写相关选项:
等待安装完成,然后就可以直接访问搭载的YetiForce CRM了。
相关主题 |